In the era of digital interconnection, children have access to the internet while they are very young. It can be an opportunity for a child to learn. Still, it can also expose a child to many risks, like access to mature content, sensitive content, and over-exposure to screen time. This raises a concern for parents on how they control the content their kids consume in the digital space. Fortunately, a WIFI router can be used as a defense because a parent can control the content his kids consume. This article will explain step-by-step guidelines on how a parent can set up parental controls on the WIFI router.
Understanding Parental Controls
Parental controls are the specifications of a Wi-Fi router that lets the parent monitor or restrict the internet in the home internet system. These features can be found in the router admin settings and the parental control app. This article will focus on the “Admin router settings.” Some of the controls that a parent can restrict, according to Kevin Bong (2025), include:
- Web Filtering– it’s also known as content filtering. It helps a parent to block some websites that he feels are inappropriate for his kid—for instance, access to adult content and violent content.
- Pause of Internet Access– this control allows the parent to set a specific time of the day when the internet will automatically turn off. This helps maintain healthy habits for kids and prevent screen addictions as it balances leisure time and offline activities like finishing assignments and reading.
- Usage Tracks Tools– this feature helps a parent to be able to know the apps and websites their kids access and the period they accessed those websites by viewing the detailed report provided.
- Website and App Blocking– Parents can manually block specific applications and websites if they feel inappropriate for their kids. For instance, a parent can block access to the internet to gaming websites and social media platforms.
Benefits of Parental Controls
- It prevents access to inappropriate content like adult content.
- Scheduled WI-FI downtime it promotes better sleep.
- It controls the screen access time, thus reducing digital overuse and addictions.
- It tracks internet usage, thus helping a parent spot risky behavior earlier.
- Digital distractions are minimized, thus improving focus in learning, e.g., doing assignments.
Steps of Setting Up Parental Controls in the WI-FI Router
The procedures below mainly apply to modern home routers with built-in parental controls like TP-link, Google Nest Wi-Fi, D-Link, Linksys, and Net gear.
Step one: Sign in to the router Admin panel
- Open the browser on the phone or computer.
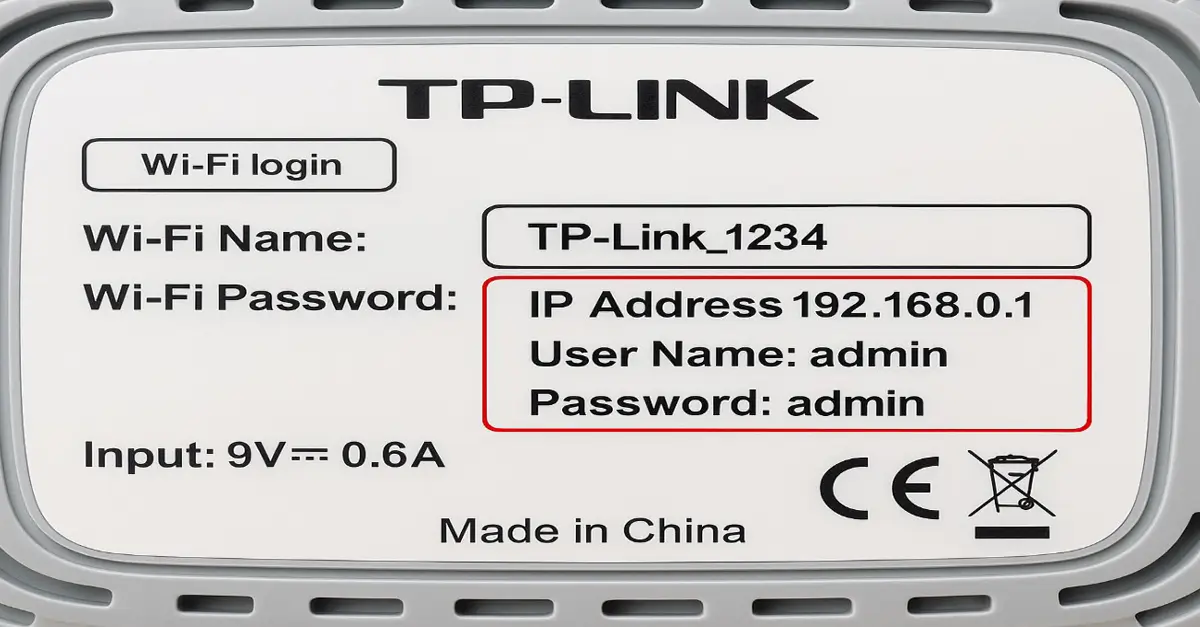
- Into the address bar, type the IP address of the router. It the most routers, it is usually 192.168.0.1
- At this stage now, you enter the router’s Admin username and password. This information is usually printed at the router if one is still using default settings or the router is new. It is also printed in the router manuals. For instance, using a TP-Link router, the default admin username and password will be “admin.” Suppose you initially changed the router’s admin logins but don’t remember them. In that case, you can reset the router and login using the default logins. An example of a default admin login in a tip-link router is shown below:
- After clicking the login button, you will be taken to the admin interface, where most router settings are located. In most routers, you will see features like status, quick setup, security, parental control, bandwidth control, system tools, etc. A good example is provided by safesurfer.
Step two: Access to the parental control settings
- After you have logged in as an admin, navigate to the parental control panel or access restrictions. It may be labeled as security settings or advanced settings in some routers. You will see these options: Website filtering for blocking specific websites, time scheduling for setting a particular time for internet access, Device profiles used to assign controls to the exact users, online activity reports for providing reports for accessed websites for a specific user, etc.
Read Also: The Most Common Causes of Slow Wi-Fi Connection
How to Configure Parental Controls
A parent can make rules to block or allow some contents in the parental control setting of the router. Some routers have already created categories for the parent to choose from. Still, if the categories are unavailable, a parent needs to type a specific keyword or website he intends to block. The router also allows a parent to set particular restrictions for a specific person and device.
A. Time Limits Configuration
Most routers allow one to choose or schedule a specific time when the internet is unavailable and when it is available. For instance, during bedtime, you can set the internet to unavailable. For one to do this, follow this procedure:
- In the parental control menu of the router,
- Navigate to the time scheduler section or time limits.
- In this section, one can set a specific time when he wants the internet to be available, save the rule. Additionally, in some routers, one can limit time for devices connected to the internet.
B. Content Filtering
A parent can easily control the kind of content accessed by his child using the home network by blocking some content and allowing others to use the parent control feature of the WIFI router.
To apply this, the parent control one needs according to Kidslox:
- Access the parental controls panels as discussed above.
- Identify the device or profile of the person you want to add filters to or in other routers. One will need to create a profile for each device.
- Click Create filter or add a new rule. One needs to choose the category of content that he needs to filter, such as social media and adult content. Some routers don’t have categories to choose from, so one must add the keywords and URLs.
- Then, you need to set the period in which the restriction will apply, which is an option for other routers. Finally, save the setting and test the rule. If it works as desired, you can make adjustments where needed.
C. Regulate Access to Particular Websites
A parent uses this method to control the type of websites his children are accessing. Two methods are used, blacklisting and whitelisting. Blacklisting blocks the listed websites, while whitelisting allows access to the listed websites. Below is the procedure used to apply it as per tp-link:
- Navigate to the parental control in the router settings.
- Locate the web filtering options and choose between the whitelist and blacklist. You can also use both features in some routers.
- Add a specific URL to either option. For instance, if one wants to block Facebook, you add a Facebook URL to the blacklist. You can also add URLs to the whitelist of the website you want to allow.
- Choose the device you want to add to and click save to apply the changes.
Conclusion
Parental control is an essential feature in the router to make sure that the content fed by the children is controlled. A parent can control websites’ access to screen time by pausing the internet connection at a particular time and blocking some applications from accessing the internet. It has positive effects as the parent can control the time spent on the screen, control the behavior of kids by restricting adult contents, and remove distractions from the children; hence, it’s prudent for a parent to apply parental control using the above-given procedures.